Showing posts with label recipes. Show all posts

Saturday, June 8, 2013

Muffin Tin Doughnuts

I didn't realize yesterday was National Donut Day until around 5 o'clock.  Probably a good thing because if I had known, I would have made these Muffin Tin Doughnuts, and let me tell you, they don't stick around for long!


Above is not the greatest pic, but as I was working on my set-up, Helena came and helped herself to the mini one and then John came and took a big one.  Perhaps they didn't notice what I was doing?  I think it was that the doughnuts were just too good for them to care.  These are seriously that good - my doughnut-loving husband, who hasn't been truly impressed by any doughnuts north of the border, said these are as good as the ones you get south of the border!

Muffin Tin Doughnuts
recipe from Cooks' Country, June/July 2013

Ingredients
2 3/4 cups all purpose flour
1 cup sugar
1/4 cup cornstarch
1 Tbsp. baking powder
1 tsp. salt
1/2 tsp. nutmeg
1 cup buttermilk
8 Tbsp. unsalted butter, melted
2 large eggs plus 1 large yolk
------
1 cup sugar
2 tsp. cinnamon
8 Tbsp. unsalted butter, melted

Directions
1. For the Doughnuts: Adjust oven rack to middle position and heat to 400 degrees.  Grease 12-cup muffin tin.  Whisk first 6 ingredients together in bowl.  Whisk buttermilk, melted butter & eggs in separate bowl.  Add wet ingredients to dry and stir until just combined.  Scoop batter into prepared tin.  Bake until doughnuts are lightly browned and toothpick inserted in center comes out clean, 19-22 minutes.  Let doughnuts cool in tin for 5 minutes.
2. For Coating: Whisk sugar and cinnamon together in bowl.  Remove doughnuts from tin.  Working 1 doughnut at a time, brush all over with melted butter, then roll in cinnamon sugar, pressing lightly to adhere.  Transfer to wire rack and let cool at least 15 minutes.

Friday, March 1, 2013

Valentines for Friends

Now I know February is over and I know that this treat doesn't really require a recipe.  BUT the responses and questions Helena & I have gotten from our valentines make a blog post necessary.


If you haven't had pretzels dipped in almond bark, then you should make some.  They're delicious.  My sister & I usually make them at Christmas time, and I've always figured everyone has had them.  But that is obviously not the case, since 6 out 8 friends that we gave them to, later asked me how to make them.  That's a lot of people who have not had them, thus this blog post.


They're super simple to make, but to find the ingredients turned out to be a bit tougher than I thought.  The almond bark we always buy for Christmas (see below) seems to be impossible to buy up here.


I went to 4 grocery stores and Bulk Barn, and none of them had it.  At Bulk Barn they did have almond bark with almonds in it, however.  We ended up making them with 4 different melted foods - almond bark with the almonds taken out of it, white chocolate, white candy melts, and strawberry bark.  The white candy melts worked best.


All you do is melt the dipping substance, dip the pretzels in (as much or as little as you want), lay them out to cool on wax paper, and then decorate.  It was a great activity for Helena and me to do together, as she loved adding sprinkles.  After they cooled, she then sorted them by decoration into different containers - something she had lots of fun with, especially as many ended up in her mouth!


We then made up Ziploc bags which contained half plain pretzels and half decorated pretzels.  While you always want to eat one of the treat pretzels, having a good mixture of salty and sweet kept them from being too much, although maybe that's a bad thing as these are quite addictive!

Monday, October 15, 2012

A Go-to Meal

What do you make when you have little time before dinner or little food in the fridge?

(the pic was a quick one, just like the meal!)
My go-to meal is a German Pancake.

It's a one-bowl, one-pan dish.  It can be served with simply syrup or something a little more time-consuming like yogurt and fruit.  Plus, for all the hungry ones around your feet, it's fun to watch while it cooks, because it grows up along the edges of the pan.

German Pancake

4-6 Tbsp. butter
6 eggs
1 1/2 cups milk
1 Cup flour
1/4 tsp. salt
powdered sugar

Heat oven to 425.  Melt butter in 9x13 pan in oven.  Mix eggs, milk, flour and salt just to blend.  Pour batter into hot butter.  Bake for 20 minutes.  Sprinkle with powdered sugar.  Cut into squares and serve with yogurt, fruit or syrup.

What is your go-to meal?  I'd love to know!

Thursday, October 4, 2012

Sweet Roasted Butternut Squash and Greens over Bow-Tie Pasta


This morning my oven looked like this:


And this afternoon it looked like this:


A brand new oven is a beautiful thing.  BEAUTIFUL.


So a never-used CLEAN oven needed to be initiated into the cooking world with a delicious meal, right?   Check out The Splendid Table's recipe

Sunday, July 29, 2012

Cooking Bacon in the Oven

I have a husband who loves bacon.  LOVES IT.

So I try to incorporate it into our meals somewhat often.  But really, who likes to stand at the stove and cook bacon?  It takes a good while!  Until now...

I've started to cook it in the oven - and it's a wonderful thing.


Here's what you do:

1) Preheat oven to 400.
2) Line baking sheet with aluminum foil.
3) Lay out the bacon so that it's almost touching - the farther apart it is, the easier it is to burn it.
4) Cook for 15-20 minutes.  Starting at 15 minutes, watch it closely as it goes from being golden and crunchy to black and burnt pretty quickly.
5) When it's done, take it off the pan immediately and put it on a paper towel-lined plate.

Notes:
1) This above photo is obviously not mine because there's no aluminum foil.  The foil makes it so easy to clean up!  Really.  Let the pan sit for about an hour, and you'll be able to fold it up with all the grease in the foil.  NO MESS!
2) Some directions on the internet say to make it by putting the bacon on a cooling rack that is in the pan.  I didn't try it because it would mean something else to clean up - and I found there was no need.  It still gets crunchy without the rack.

Saturday, May 19, 2012

Chai

With the weather turning nice and warm, delicious cold beverages are wonderful.  Right?  Well, a few months ago I came across this recipe for chai concentrate.  In case you're not familiar with what that is, if you go to the tea aisle in the local grocery store, on the top shelf there are often boxes that look like this:


At Walmart one box like the above costs $7.67. I don't know about you, but that doesn't work in my budget very well. But now we can make our own, which means you can make delicious iced chai lattes!

Ingredients:
  • 2 tsp. minced ginger
  • 1 cinnamon stick
  • 8 whole cloves
  • 2 heaping demitasse spoons powdered cardamon (or 15-20 green cardamon pods)
  • 2 cap fulls non alcohol vanilla extract
  • 2 dashes of nutmeg
  • 2 heaping Tbsps sugar
  • 1/2 cup honey
  • 4 cups water
  • 6 Bigelow Darjeeling Blend tea bags, or other black tea bag (I used English Breakfast)
Directions:
Put everything except the tea bags into the crock pot (recipe called for 1 1/2 qt. crock pot but I used my 5 1/2 qt. and it worked fine). Cook on high for 3-4 hours or low for 7-8 hours. After long simmer, if heat is not on high turn to high. Add tea bags. Let steep for 5-10 minutes. Remove tea bags and press with spoon to get all water out. Pour crock contents over strainer into 1 quart resealable beverage container. Add water to make 1 quart. This will get you what comes in the box pictured above. Serve (see below) or store in fridge.


To serve:

To make iced or hot Chai Latte, add equal parts concentrate to milk and serve over ice or heat in microwave or use conventional steamer. (We like it hot with a mix of skim and whole milk, but iced with just skim. We also tried it in a milkshake!)

Easy - yes
Different - yes
Delicious - absolutely

Recipe found at Vegetarian Slow Cooker

Saturday, December 3, 2011

Fantastic Finger Foods

Helena loves to eat.  She's over and done with purees and wants flavor all the time!  Helena also likes to feed herself most everything now.  (Pushing our hands away or picking food off of the spoon in order to put it in her mouth independently happens regularly.)  So Helena wants flavor, she wants finger food, and the doctor wants fatty foods in order to bulk her up a bit.  And her mom wouldn't mind foods that don't make too huge of a mess :)

She usually eats what we eat but I do make special simple things for just her too.  So after scouring the internet for flavorful, simple, fatty, non-messy finger food for Helena.  Here are the three best foods I've found:
1) Hardboiled egg yolk mashed up with avocado and spread on bread, pita, tortilla, naan, etc.   Yum.

2) Meatballs.  It's so easy to mix up a batch of meatballs, freeze them, and then cook one for Helena or a bunch for all three of us!

3) Banana Custard - A banana, two eggs, and blueberries, steamed for 30 minutes.  Easy, flavorful, full of protein, only makes 3 dirty dishes, and Helena loves this.  John & I think it tastes pretty good too!


Do you have any other ideas for me?  

Friday, November 4, 2011

Beware of an Up and Coming Addiction

A special treat that John's grandma makes is called Cracker Candy.  It's delish.  Saltines, butter, brown sugar, and chocolate chips - not hard to see why it's good, right?  But it's not just good, it's incredibly addicting.  So much so that I try to not make it very often because I know I'll eat way more than I should.

Yet John loves it and wishes I made it more often.  Being the ingenious and daring man that he is, he took on the challenge to come up with a 
personal-size microwave-friendly recipe.


Arrange six saltines on parchment paper in a glass container that will contain the future goo. (Parchment paper is crucial, as otherwise the cracker candy will be difficult to get out and aluminum paper doesn't mix with the microwave.)


Nuke 2.5 Tbsp butter and 2.5 Tbsp brown sugar until butter is melted.  


Stir.  Nuke it for 30 seconds at a time, stirring after each nuke, until the caramel is thick and combined.


Pour over saltines.  Nuke crackers & caramel until the goo is bubbling all over, somewhere between 1.5-2.5 minutes.


Sprinkle 3-4 Tbsp. of chocolate chips on top.  


Nuke for another 30 seconds and then spread the chocolate to cover the crackers.


Freeze until solid, around 45 minutes.


Twiddling thumbs is a good activity to help fill the time while you wait.


Break into pieces and try to eat only one piece.  


The below photo has microwave cracker candy on the left and oven cracker candy on the right.  There's really no difference!


All photo credits for this blog post belong to John.

Thursday, October 27, 2011

CrockPot Success!

Have you ever mixed up a batch of granola, put it in the oven and then come back to it to find it burnt?  Ugh, it's a horrible thing that I've experienced at least three times.  So when I read that you can make granola in a slow cooker, I decided to try again.

It was so easy!


I've read that any recipe will work.  So here's what you do - choose your recipe, mix it up, then put it in the CrockPot for 2-3 hours.  The slow cooker does need a vent, so take a chopstick and stick it on the side to keep the lid slightly open.  You have to remember to stir it every 20 minutes, but it's easy to do that, as when you can smell it cooking, that means it's time to stir! 

Friday, September 16, 2011

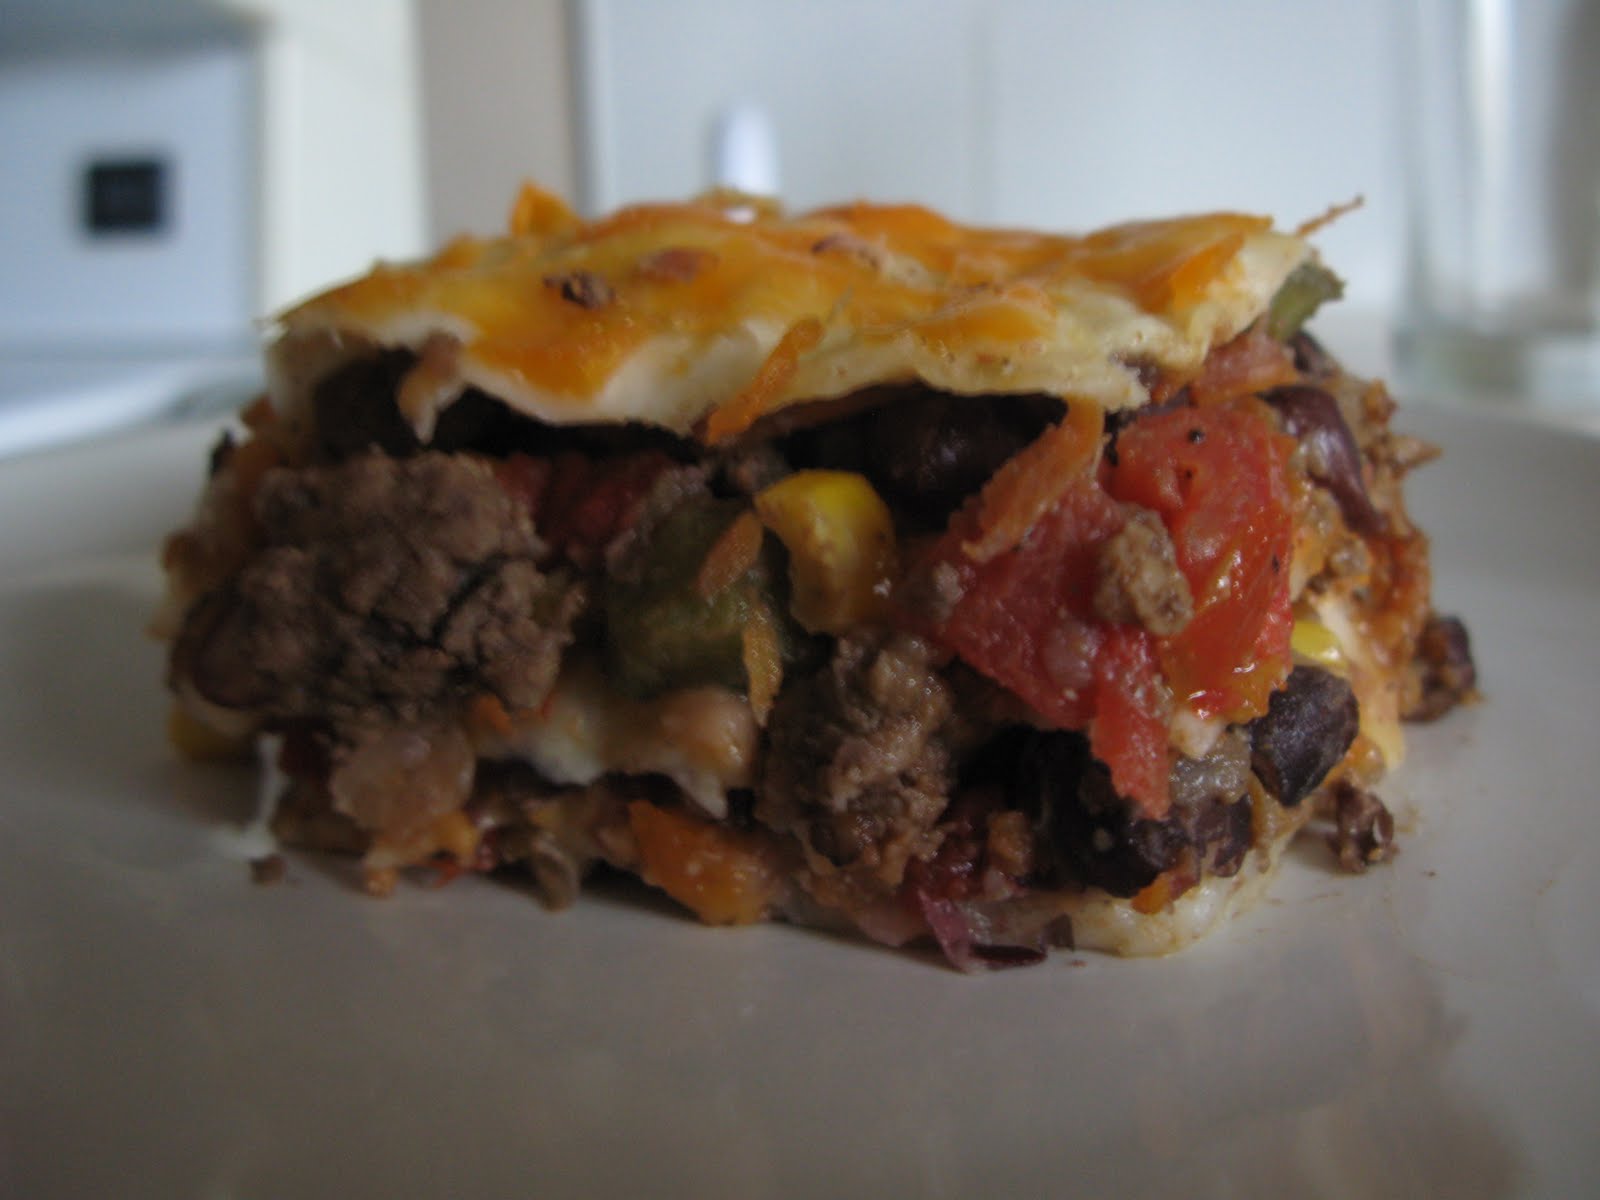
Crock Pot Recipe #2: Slow Cooker Enchiladas


Source: I recently did a cookbook swap with a friend, so now I'm exploring the pages of Simply in Season. This recipe is for the summer, and since it was 83F at dinnertime on Tuesday, I'd say we were in season!

Recipe:
Slow Cooker Enchiladas
serves 6-8

1 lb. ground beef, turkey or venison
1 cup onion, chopped
1/2 cup green pepper, chopped
Cook together in a large skillet until meet is browned and vegetables are tender. Drain off fat.

2 cups cooked pinto or kidney beans
2 cups cooked black beans
2 cups tomatoes, chopped
1/3 cup water (1/4 if using summer squash)
1 tsp chili powder
1/2 tsp ground cumin
1/4 tsp pepper
1 cup summer squash or carrots, grated (opt.)
1 cup corn (opt.)
ground red pepper to taste
Add and bring to a boil. Reduce heat; cover and simmer for 10 minutes.


2 cups shredded Cheddar cheese or Monterey Jack cheese or a mix of the two
7 flour tortillas 6-7 inches

In a slow cooker layer about 1 cup meat-bean mix, one tortilla and 1/3 cup cheese. (In my 6-quart oval slow cooker, I did 2 cups, 2 tortillas, and 2/3 cup cheese, using a total of 6 tortillas.) Repeat to use all ingredients.


Cover and cook on low for 5-7 hours or until heated through.
****Here's why I disagree with the recipe! 5-7 hours on low seemed like a very long time to heat up a mixture that was already completely cooked. So I planned on 5 hours on warm, it ended up being 6, and it was a tiny bit dry. If I make it again, I'll probably do 3-4 on warm.

Verdict:
John really liked this; I thought it was okay. We added salsa on top. If I were looking for a hot meal to have in the summer that did not require the oven to be turned on, I may turn to this recipe. If I do, I will at least double the spices.

Monday, August 22, 2011

Roasted Chicken in a CrockPot

This past week's challenge was for an entree. I wanted a recipe for something that was easy and that would be used over & over again. How about roasting a chicken in the CrockPot? It turned out beautifully; the meat fell off the bones as I was lifting the chicken out! If you're interested, click here for more info.


Using this recipe has inspired me to challenge myself in a new way. I've really been missing my Monthly Menus but have been wanting to do something different. And since our CrockPot does take up a bit of room in our little kitchen...

I'm going to use the slow cooker for one meal a week until the end of 2011. Hopefully I'll end up with some delicious easy meals. If you have any recipes to share, I'd love them. Check back in if you are interested in using your own CrockPot more too!

Saturday, August 20, 2011

French Toast Waffles


Looking for a new twist on breakfast for dinner? How about French Toast Waffles? I found the idea in the JOY of Cooking and it was delicious and easy. Mix up your french toast mix as usual, dip your bread, and then put it in the waffle maker rather than on the griddle!

This is definitely going into my new recipe file for simple family meals!

Monday, August 15, 2011

Spinach-and-Artichoke Dip


Another week has gone by, and this week's challenge was an appetizer. We had Spinach-and-Artichoke Dip. I wouldn't really recommend the recipe I used, but still wanted to put the post on this blog for my own record-keeping sake.

Sunday, August 7, 2011

Monthly Challenges

A few friends of mine & I have been having monthly challenges for the last three months. It's been really fun to have a project going on with other people while I'm a stay-at-home mom life. Provides a strange sense of community.

The first month required us to take 30 photographs, one each day, of our children. The type of photograph was specified, such as a close-up, one featuring the eyes, one using bokeh, etc. It helped me to learn more about our camera, as well as get some good (and some bad) photos of Helena. Oh, and the grandparents LOVED seeing a new photo of her everyday.

Memorizing Philippians 3 was the challenge for July. I made it through verse 6.

August's challenge is right up my alley - trying four new recipes and then sharing our thoughts on them. It's great! If anyone is interested, the category for this week was a beverage and we tried Luscious Slush Punch.


Click here if you want to read the blog post about it. Also, let me know if any of you moms want to join us in the challenges!

Sunday, July 3, 2011

A different kind of potato salad

Moosewood's Simple Suppers has been my go-to cookbook since March. I counted this morning and I've made 55 recipes from it! This exercise of cooking through a cookbook has been fun; a lot of the food has been good, plus crossing off or highlighting recipes gives me such a sense of satisfaction. It's like getting a job done and crossing it off your list!

The one recipe that I have made over and over and over again is Indian Potato Salad. It's not your typical potato salad at all, but it's really good. I recommend you try it.


4 cups cubed potatoes (1-inch cubes)
3 TBSP vegetable oil
2 tsp whole cumin seeds
1 1/2 tsp salt
1 1/2 tsp curry powder or garam masala (I use the latter)
pinch of cayenne or a splash of Tabasco or other hot sauce
2 or 3 scallions, sliced
1 red bell pepper, chopped
1/4 cup chopped fresh cilantro

Bring a pot of salted water to a boil. Cook the potatoes in the hot until under tender but not falling apart, about 5 minutes after water is boiling again. While they cook, warm the oil in a pan on medium heat. Sizzle the cumin seeds for a few seconds and then stir in the salt, garam masala, and cayenne. Remove from heat. Drain the potatoes and place them in a bowl. Pour the hot seasoned oil over the potatoes and add the scallions, bell pepper and cilantro. Stir gently. Best eaten warm or at room temperature.

Monday, June 13, 2011

A snack from Simple Suppers

We've tried five new recipes so far from Moosewood's Simple Suppers.

Some have been okay, some have been good, and these are great:


Sweet & Spicy Nuts

We're enjoying them right now as we watch the sixth game of the Stanley Cup Finals. In case any of you are planning on watching the Canucks win the seventh game, I thought I'd share the recipe:

1/3 cup sugar
1/2 tsp. salt
1/2 tsp. black pepper
1/2 tsp. ground cardamom
1/2 tsp. cinnamon
pinch of cayenne (optional)
3 cups shelled nuts

Preheat oven to 350. Oil baking sheet. In saucepan on medium-high heat, stir together the first six ingredients and 1/4 cup water. Bring to a boil then reduce heat to simmer and stir until sugar is dissolved. Remove from heat, add nuts, and stir until nuts are coated. Spread nuts on baking sheet. Bake until browned, 10 to 15 minutes, stirring once after 6 minutes. Stir again to break any clusters when they're taken out of the oven. Allow nuts to cool. Enjoy!

Thursday, April 21, 2011

Two Questions

Question #1: When will it end?

It = this weather. This cold, damp, windy weather. We were on the University of Toronto's campus today and everyone was wearing warm coats, hats, mittens, scarves, etc. Winter clothes. So strange to think that school is over for the summer when it feels and looks like the fall!

Question #2: Do you have this problem?


Plain yogurt. I can only find it in large containers in the grocery store, but I buy it anyways because it makes such a delicious addition to certain Indian recipes. But then there is all the extra that I never know what to do with it.

With the help of allrecipes.com, I now have the answer:


We discovered the recipe on one of 2011's two glorious 70 degree days. Now we're enjoying the smoothies when we pretend that it's wonderful outside.

Wednesday, December 1, 2010

[Sigh of Relief] It's over.

December has arrived, meaning that Notre November has reached an end. Phew.

Honestly, I've enjoyed it but there has been stress. Trying to make at least one of our favorites everyday, having enough pictures of food so I could leave for nine days, wanting good pictures despite the lack of light and the desire to eat the food while it was still hot...like I said, phew.

A few things I've learned this month:

1) I love all these foods but I got bored. New recipes add quite a bit of fun to cooking.
2) The Skinny Pukeko will have two types of food that are not made in its kitchen - pasta and bread.
3) Having all the food posts to do made me feel I shouldn't blog about other stuff. My preference is to have a random blog that includes a bit of everything but not all of one thing. I hope that's okay with all of you!

Thanks for sticking with us through the last month. I hope the photos made you hungry to eat something really good, whether it was one of Skinny Pukeko's menu items or something in your fridge. Many people did ask for the Roasted Zucchini Torta, so I'll end the month with the recipe. Oh, and December has no theme.

Roasted Zucchini Torta with Tomatoes & Mozzarella
from The Complete Italian Vegetarian Cookbook

6 medium zucchini
5 Tbsp. olive oil
Salt & black pepper
2 medium garlic cloves, minced
1 3/4 cups canned crushed tomatoes
2 Tbsp. minced fresh basil leaves
10 oz. mozzarella cheese, shredded (about 2 1/2 cups)
1/4 cup Parmigiano-Reggiano cheese

1. Preheat oven to 400. Cut the zucchini lengthwise into 1/4-inch-thick slices. Lay the slices on 2 large baking sheets. Brush both sides with 3 Tbsp. oil and sprinkle with salt and pepper. Bake until the slices start to brown around the edges, about 25 minutes. Cool.
2. While zucchini is in the oven, heat 1 Tbsp oil in medium saucepan. Add garlic and saute for 1-2 minutes. Add tomatoes and simmer until sauce is thick and has reduced to about 1 1/3 cups, about 15 minutes. Stir in basil; add salt and pepper to taste. Set aside.
3. Brush bottom and sides of 9-inch springform pan with remaining 1 Tbsp. oil. Line bottom with layer of zucchini slices, cutting pieces if necessary to cover the pan completely. Do not overlap slices. Spoon 1/3 cup sauce over zucchini and sprinkle with 1/2 cup mozzarella and 1 Tbsp. Parmigiano-Reggiano. Repeat process, making 3 more layers of zucchini, tomato sauce and cheese.
4. Bake at 400 for 30 minutes or until middle bubbles and sides begin to brown. Let sit 15 minutes on wire rack, then take off pan sides. Serve lukewarm.

Notes: It seems like a lot of zucchini but you do need it. It really is much better served lukewarm. You can wrap the torta tightly and refrigerate overnight. Just unwrap and put in the oven when ready, increasing the bake time by 5 to 10 minutes.

Thursday, October 7, 2010

Monthly Menus are Back!

Feedback has reported that people enjoy knowing what's being cooked and eaten in our kitchen each month. So, the monthly menus are back...they actually never left but were not exciting enough for blog posts.

We finished summer off with Just Use It July and All-Gone August. Whenever it's moving time I am always amazed at how much food we have in our cupboards and freezer. So our focus was put into using it all up! We left BC with only one cloth bag full of food & condiments being sent over to a friend's house...pretty good if you ask me.

Our September was spent in a friend's friend's apartment while the friend was away. Really, an amazing gift to be able to live there for almost a month (rent free!) while we searched and searched for an apartment in Toronto. The month was spent eating simple meals, ones that didn't require many ingredients or a recipe; thus titled Simple September.

The best meal of the month - Roasted Vegetable Quesadillas. SO GOOD. Here's what you do:

1) Roast whatever vegetables you want (recommending cauliflower, broccoli, bell peppers of any color, onion).
2) On a baking sheet, put flour tortilla, grated cheddar cheese, roasted veggies, more cheese, and then another tortilla. Bake at around 400 degrees until the tortilla is crisp and cheese is melted.
3) Eat with salsa.

Simple, huh?

And now for the present - it's One-Dish October! Anything that can be a meal unto itself - even if we prefer to have fruit or veg or bread on the side - counts. Crock-pot recipes are great but the month is not constrained to that appliance. So far we've had Lentil Taco Salad, Mexican Minestrone, and Waffles. I would LOVE any recipes that you enjoy, especially slow cooker ones!

Wednesday, June 30, 2010

The New Chef of the Household

June has been great. There have been times when I've had a planned item for John to grill, but otherwise he's been in charge of the kitchen (even if the grill hasn't been used). This has been great for two reasons:

1) I haven't had to think about food as soon as we get home from work.
2) John is very good at making due with what we have, so we've been using things up.

Grilled corn on the cob was beat out for best grilled food when John made this:


A Frisco Burger.

Remember how I said John was good at making due with what we have? Well, one night I was like, "I guess we could have hamburgers," and the next thing I knew John was researching how to make Frisco burgers. The sourdough bread sitting on the counter had given him the idea, and was it ever an amazingly wonderful idea. What were the called-for ingredients?

Sourdough Bread
Hamburger
Swiss Cheese
Lettuce
Tomato
Sauteed Onions
Mayo (I had ketchup and mustard instead)

I sure hope Frisco burgers become a regular at our house!